Introduction to Simple Nail Art
Nail art is a fun and stylish way to express yourself—no professional skills needed! Whether you’re a beginner or just looking for quick, easy designs, simple nail art can transform your manicure in minutes. This guide covers essential tools, step-by-step techniques, and creative ideas to help you achieve beautiful nails at home.

Why Choose Simple Nail Art?
Simple nail art is perfect because it’s:
✔ Budget-friendly – Skip salon costs with DIY designs.
✔ Quick & easy – Ideal for busy schedules.
✔ Customizable – Match your nails to your mood or outfit.
✔ Beginner-approved – No advanced skills required!

Must-Have Nail Art Tools
Before you start, gather these basics:
- Base coat & top coat – Protects and prolongs polish.
- Nail polish (assorted colors) – Experiment with shades!
- Dotting tools or toothpicks – For dots and fine details.
- Striping tape or thin brush – Helps create clean lines.
- Nail stickers/stencils – Effortless designs for beginners.
- Makeup sponge – Perfect for gradient effects.

5 Easy Nail Art Designs to Try
1. Polka Dot Nails (Classic & Cute)
How to do it:
- Paint nails with a base color (e.g., soft pink).
- Dip a dotting tool (or toothpick) in a contrasting polish.
- Gently press dots in a random or patterned layout.
- Seal with a top coat for shine.

2. Striped Nails (Sleek & Stylish)
How to do it:
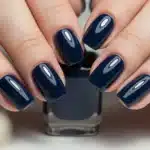
- Apply a solid base color (try navy or black).
- Use striping tape or a thin brush to paint straight or diagonal lines.
- Let dry, then add a glossy top coat.

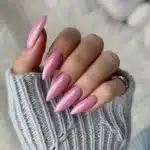
3. Glitter Accent Nail (Simple Glam)
How to do it:
- Paint all nails with a neutral shade (beige, white, or nude).
- Apply glitter polish to one or two accent nails.
- Finish with a top coat for extra sparkle.

4. French Tips with a Colorful Twist
How to do it:
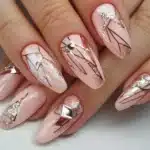
- Start with a light or nude base.
- Instead of white, use a bold color (red, blue, or gold) for the tips.
- Add tiny dots or stripes for a playful touch.

5. Sponge Gradient (Ombre Effect)
How to do it:
- Paint nails with a light base color.
- Dab two complementary shades on a makeup sponge.
- Press gently onto nails for a blended ombre look.
- Clean edges with polish remover and apply top coat.

Pro Tips for Long-Lasting Nail Art
- Always start with clean, dry nails.
- Apply thin layers to avoid smudging.
- Use a quick-dry top coat to lock in designs.
- Avoid hot water for 1 hour after painting.

Final Thoughts
You don’t need to be an expert to create stunning nail art! With these easy designs and a little practice, you can achieve salon-worthy nails at home. Experiment with colors, patterns, and textures to find your favorite style.

Frequently Asked Questions
Q: How do I remove nail art easily?
A: Use acetone-based remover and cotton pads for quick cleanup.

Q: Can I do nail art on short nails?
A: Yes! Simple designs like dots, stripes, and glitter accents work great on short nails.
Q: How long does DIY nail art last?
A: With a good top coat, it can stay fresh for 5-7 days.

Now it’s your turn—grab your polishes and start creating! Share your favorite designs in the comments below. 💅✨

If you want more creative and unique designs then short short nails will also help you in achieving your goal..

Sarah Williams is an experienced blogger and fashion enthusiast at Glammer Galaxy. With a passion for beauty and style, she shares expert insights on hair trends, nail art, and fashion tips. Her creative flair and years of experience make her a go-to source for all things glam!