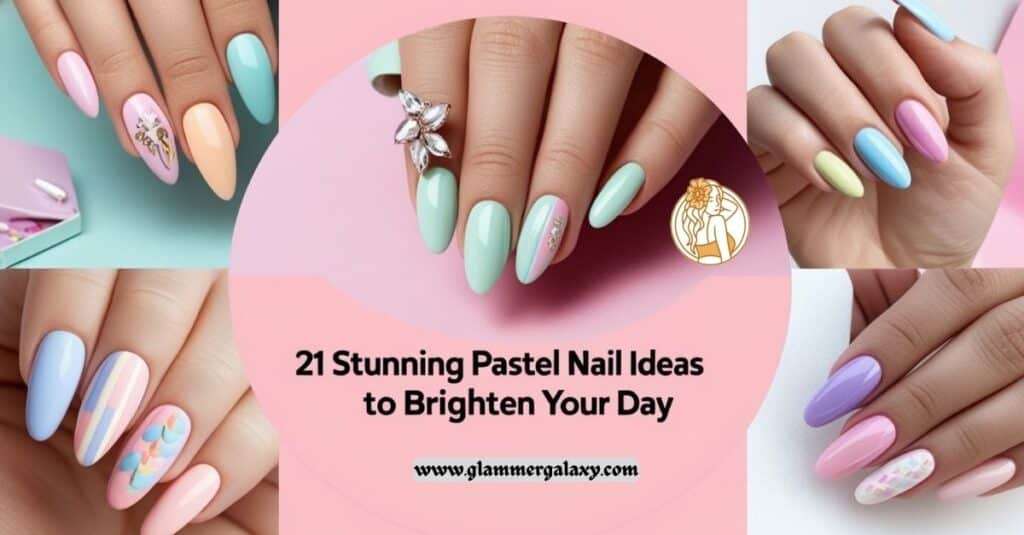
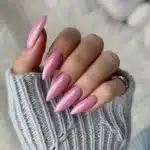
In the ever-evolving world of nail art, pastel nails have emerged as a timeless trend that continues to captivate beauty enthusiasts.
These soft, muted hues have the power to transform your look. In this comprehensive guide will walk you through 21 stunning pastel nail ideas that are sure to brighten your day and elevate your style.
The Allure of Pastel Nails
Pastel colors have been gracing our palettes for centuries, but their popularity in nail art has skyrocketed in recent years. These gentle hues, reminiscent of spring blooms and cotton candy skies, offer a refreshing alternative to bold, vibrant shades. Pastel nail designs can be both subtle and statement-making, making them perfect for any occasion.
“Pastel nails are like a breath of fresh air for your fingertips. They’re soft, sophisticated, and incredibly versatile.” – Celebrity Nail Artist, Mei Kawajiri
21 Stunning Pastel Nail Ideas
Minimalist Pastel Accents
For those who prefer a more understated look, minimalist pastel accents are the way to go. This technique involves adding small touches of pastel colors to a neutral base, creating a chic and modern aesthetic.
How to achieve the look:
- Apply a neutral base coat (think nude, beige, or clear)
- Using a thin brush or dotting tool, add small pastel accents
- Try single dots, thin lines, or tiny geometric shapes
- Seal with a clear top coat for longevity
Pro tip: Mix and match different pastel shades for a playful yet sophisticated look.
See Also : Showering After an Ice Bath Myth or Necessity
Pastel Gradient Sunset
Transform your nails into a dreamy pastel sunset with this eye-catching gradient technique. This design mimics the soft, blended colors of a twilight sky, creating a soothing and romantic effect.
Steps to create a pastel gradient sunset:
- Apply a white base coat
- Choose 3-4 complementary pastel shades (e.g., pink, peach, lavender, and baby blue)
- Using a makeup sponge, dab the colors onto your nails in horizontal stripes
- Blend the colors gently for a seamless transition
- Clean up any excess polish around the edges
- Finish with a glossy top coat
Pastel Terrazzo Pattern
Inspired by the speckled look of terrazzo flooring, this nail art design brings a touch of architectural chic to your fingertips. The key to nailing this look is creating a random pattern of pastel flecks on a neutral base.
Materials needed:
- Neutral base color (white or beige work well)
- 3-5 pastel nail polishes
- Thin brush or toothpick
- Clear top coat
Technique:
- Apply the neutral base color and let it dry completely
- Using a thin brush or toothpick, create small, irregular shapes with your pastel colors
- Vary the size and distribution of the flecks for a more authentic terrazzo look
- Allow the design to dry, then seal with a clear top coat
Pastel Cloud Nails
Bring a touch of whimsy to your manicure with pastel cloud nails. This dreamy design is perfect for spring and summer, evoking feelings of lightness and serenity.
Creating the perfect cloud design:
- Start with a pale blue or lavender base
- Using white polish and a small brush, create puffy cloud shapes
- Add dimension by blending in touches of pastel pink or yellow at the edges of the clouds
- For extra sparkle, consider adding tiny silver dots as “silver linings”
Pastel Tie-Dye
Channel your inner bohemian with pastel tie-dye nails. This watercolor-inspired technique creates a soft, dreamy effect that’s both playful and sophisticated.
Achieving the tie-dye look:
- Apply a white base coat
- Drop small amounts of different pastel polishes onto the nail
- Use a thin brush or toothpick to swirl the colors together gently
- Clean up any excess polish around the edges
- Seal with a clear top coat for a smooth finish
Color combinations to try:
- Pink, peach, and lavender for a sunset-inspired look
- Mint, baby blue, and pale yellow for a spring vibe
- Lilac, rose, and periwinkle for a dreamy purple palette
Pastel Geometric Shapes
For those who love clean lines and modern designs, pastel geometric nails are a perfect choice. This style combines the softness of pastels with the boldness of geometric patterns.
Creating geometric pastel nails:
- Start with a neutral base color
- Use striping tape or nail stencils to create sharp lines and shapes
- Fill in the shapes with different pastel shades
- Carefully remove the tape or stencils
- Apply a clear top coat to smooth out any ridges
Popular geometric patterns:
- Triangles
- Hexagons
- Chevron
- Color-blocked squares
Pastel Daisy Dreams
Bring a touch of nature to your nails with delicate pastel daisies. This charming design is perfect for spring and summer, or anytime you need a mood boost.
Steps for creating pastel daisy nails:
- Apply a pastel base color (light blue, mint, or pale pink work well)
- Using a dotting tool, create small white circles for the daisy centers
- With a thin brush, draw white petals around each center
- Add tiny yellow dots in the center of each daisy for a realistic touch
- Seal the design with a clear top coat
Variation: Try mixing different pastel colors for the petals while keeping the centers white for a multicolored daisy effect.
Pastel Holographic Shimmer
Combine the softness of pastels with the magic of holographic shimmer for a truly mesmerizing nail look. This technique adds depth and dimension to your pastel manicure.
Creating holographic pastel nails:
- Apply your favorite pastel shade as a base
- Once dry, apply a holographic top coat
- For extra sparkle, add a layer of fine holographic glitter
- Seal with a clear top coat for longevity
Pro tip: Choose a holographic top coat that complements your base color. For example, a pink-toned holo over a pastel pink base, or a blue-toned holo over a pastel blue.
Pastel Leopard Print
Give the classic leopard print a soft, feminine twist with pastel colors. This unexpected combination of pattern and palette creates a playful yet sophisticated look.
Steps for pastel leopard nails:
- Apply a light pastel base color
- Using a darker pastel shade, create irregular oval shapes
- With a thin brush and black polish, outline the shapes partially
- Add black dots between the shapes for authenticity
- Seal with a clear top coat
Color combinations to try:
- Pale pink base with peach spots and black outlines
- Mint green base with baby blue spots and black outlines
- Lavender base with periwinkle spots and black outlines
Pastel Negative Space Moons
Embrace the negative space trend with pastel moon designs. This minimalist approach creates a modern, graphic look that’s perfect for any occasion.
Creating pastel negative space moons:
- Apply base coat to clean, shaped nails
- Using circular stickers or a steady hand, create half-moon shapes at the base of each nail
- Fill in the rest of the nail with your chosen pastel shade
- Carefully remove the stickers to reveal the negative space
- Add a clear top coat for shine and protection
Variation: Try inverting the design by applying pastel polish to the moon shape and leaving the rest of the nail bare.
Explore More: 14 Top Nails for Red Dress
Pastel Marbled Swirls
Create a luxurious, stone-inspired look with pastel marbled swirls. This technique mimics the natural patterns found in marble, resulting in a unique and elegant nail design.
Achieving the marbled effect:
- Start with a white or very light pastel base
- Drop small amounts of different pastel polishes onto the nail
- Use a thin brush or toothpick to create swirling patterns
- Blend the colors slightly, but maintain distinct swirls
- Clean up any excess polish around the edges
- Seal with a clear top coat for a smooth finish
Pro tip: For a more realistic marble effect, add thin metallic lines to mimic the veining in natural stone.
Pastel Ombré French Tips
Give the classic French manicure a modern twist with pastel ombré tips. This fresh take on a timeless style is both elegant and on-trend.
Steps for pastel ombré French tips:
- Apply a sheer nude or pale pink base
- Choose 2-3 complementary pastel shades
- Using a makeup sponge, dab the lightest shade at the tip of the nail
- Gradually blend in the darker shades, creating a smooth gradient
- Clean up any excess polish around the edges
- Finish with a glossy top coat
Color combinations to try:
- Pale pink to peach to coral
- Mint to seafoam to turquoise
- Lavender to periwinkle to baby blue
Pastel Splatter Art
Channel your inner Jackson Pollock with pastel splatter nail art. This fun and energetic design is perfect for those who love a more abstract, artistic look.
Creating pastel splatter nails:
- Apply a white or very light pastel base
- Dip a small brush or straw in pastel polish
- Tap the brush against your finger to create small splatters on the nail
- Repeat with different pastel colors
- Allow the design to dry completely
- Seal with a clear top coat
Pro tip: To contain the mess, create a “splatter station” by laying down newspaper or a plastic sheet before starting.
Pastel Mosaic Tiles
Transform your nails into miniature works of art with pastel mosaic tile designs. This intricate look requires patience but results in a stunning, eye-catching manicure.
Steps for pastel mosaic nails:
- Apply a neutral base color
- Using a thin brush, create small squares or irregular shapes in various pastel colors
- Leave tiny gaps between each “tile” for authenticity
- Once dry, use a black or dark gray thin brush to outline the tiles
- Fill in the gaps with a contrasting color to mimic grout
- Seal with a clear top coat
Variation: For a 3D effect, use nail gems or studs to create raised mosaic pieces.
Pastel Butterfly Wings
Bring a touch of nature-inspired magic to your nails with delicate pastel butterfly wing designs. This ethereal look is perfect for spring and summer.
Creating butterfly wing nails:
- Apply a light pastel base color
- Using thin brushes, create abstract wing patterns with complementary pastel shades
- Add fine lines and details to mimic wing veins
- For extra sparkle, incorporate shimmery polish or fine glitter
- Seal with a clear top coat
Pro tip: Use real butterfly wings as inspiration for authentic patterns and color combinations.
Pastel Tortoiseshell
Give the classic tortoiseshell pattern a soft, pastel makeover. This unexpected combination creates a unique and sophisticated nail look.
Achieving pastel tortoiseshell:
- Apply a light pastel base (beige or cream work well)
- Using a thin brush, create irregular shapes with darker pastel shades
- Layer the shapes for depth and dimension
- Add small black or dark brown accents for authenticity
- Blend the edges slightly for a more natural look
- Finish with a glossy top coat
Color combinations to try:
- Beige base with peach and light brown accents
- Pale pink base with coral and taupe accents
- Mint base with sage and pale yellow accents
Recommended for You: 50 Teal Nail Designs That Will Elevate Your Style
Pastel Mermaid Scales
Embrace your inner mermaid with pastel-hued scale designs. This whimsical nail art is perfect for beach days or anytime you want to add a touch of fantasy to your look.
Creating pastel mermaid scales:
- Apply a light pastel base color
- Use a fishnet stocking or scale stencil to create the pattern
- Dab on different pastel shades over the stencil
- Carefully remove the stencil to reveal the scale pattern
- Add iridescent top coat for extra shimmer
- Seal with a clear top coat
Pro tip: Experiment with different scale sizes by stretching or relaxing the fishnet stocking.
Pastel Boho Patterns
Incorporate bohemian-inspired designs into your nail art with pastel boho patterns. This eclectic style combines geometric shapes with organic elements for a free-spirited look.
Elements of pastel boho nail art:
- Chevron patterns
- Tribal-inspired triangles
- Mandala-like circles
- Feather designs
- Dream catcher motifs
Creating pastel boho nails:
- Start with a neutral base
- Use thin brushes to create various boho-inspired patterns
- Incorporate multiple pastel shades for a colorful effect
- Add metallic accents for a touch of glamour
- Seal with a clear top coat
Pastel Agate Stone
Mimic the natural beauty of agate stones with this stunning pastel nail design. The layered effect creates depth and interest, resulting in a truly unique manicure.
Steps for pastel agate nails:
- Apply a white or very light pastel base
- Using a thin brush, create irregular circular shapes with different pastel shades
- Layer the colors, allowing each to dry slightly before adding the next
- Add thin, wavy lines to mimic the natural banding in agate
- For extra realism, incorporate metallic accents
- Seal with a glossy top coat for a stone-like finish
Pro tip: Look at real agate slices for inspiration on color combinations and patterns.
Pastel Candy Stripes
Bring a touch of retro charm to your nails with pastel candy stripes. This sweet design is perfect for summer and adds a playful pop of color to any outfit.
Creating pastel candy stripes:
- Apply a white base coat
- Use striping tape or a thin brush to create evenly spaced lines
- Fill in alternating stripes with different pastel shades
- Carefully remove the tape (if used)
- Add a clear top coat for a smooth finish
Variation: Try diagonal stripes or mix thin and thick lines for added interest.
Other Post You Might Like: Can I Paint on Top of Acrylic Nails? A Guide to Nail Art
Pastel Constellation
Bring the night sky to your fingertips with pastel constellation nails. This dreamy design combines the softness of pastels with the magic of starry nights.
Steps for pastel constellation nails:
- Apply a pastel base color (light blue, lavender, or mint work well)
- Using a thin brush or dotting tool, create small stars and dots in white or metallic polish
- Connect some of the stars with thin lines to form constellations
- Add larger stars or moon shapes for focal points
- For extra sparkle, dust with fine glitter
- Seal with a clear top coat
Pro tip: Use real constellation maps as inspiration for authentic star patterns.
Expert Tips for Perfect Pastel Nails
To achieve flawless pastel nail designs, consider these expert tips:
- Prep is key: Always start with clean, well-shaped nails. Use a base coat to prevent staining and help the polish adhere better.
- Invest in quality tools: Good brushes and dotting tools can make a huge difference in the precision of your designs.
- Layer for opacity: Many pastel shades require multiple coats for full coverage. Be patient and allow each layer to dry before adding the next.
- Seal your design: Always finish with a good quality top coat to protect your design and add shine.
- Practice makes perfect: Don’t get discouraged if your first attempts aren’t perfect. Nail art takes practice!
Choosing the Perfect Pastel Palette
When selecting pastel shades for your nail art, consider the following:
- Undertones: Pay attention to whether a pastel has warm or cool undertones. This can affect how it looks against your skin tone.
- Complementary colors: Use a color wheel to find pastel shades that work well together.
- Seasonal adaptations: Lighter pastels work well for spring and summer, while slightly deeper pastels can transition into fall.
DIY vs. Professional: When to Splurge
While many pastel nail designs can be achieved at home, some complex techniques might be best left to the professionals. Consider these factors:
DIY-friendly designs:
- Minimalist accents
- Simple geometric patterns
- Ombré effects
- Basic French tips
Professional-worthy techniques:
- Intricate hand-painted designs
- Complex marbling effects
- 3D nail art
- Precision geometric patterns
When deciding whether to DIY or visit a salon, consider the complexity of the design, the tools required, and your own skill level and patience.
Trending Pastel Nail Art on Social Media
Social media platforms are a goldmine for pastel nail inspiration. Here are some popular hashtags to explore:
- #PastelNails
- #PastelNailArt
- #PastelMani
- #NailArtAddict
- #NailsOfInstagram
TikTok nail art hacks for pastels:
- Use a makeup sponge for perfect ombré effects
- Create marble effects with a water cup and toothpick
- Use household items like straws or bobby pins for unique designs
Caring for Your Pastel Manicure
To keep your pastel nail art looking fresh, follow these care tips:
- Wear gloves when doing household chores
- Apply cuticle oil daily to nourish your nails and skin
- Touch up chips with matching polish and clear top coat
- Avoid exposing your nails to excessive heat or water
When it’s time to remove your pastel nail art, use a gentle, acetone-free remover to prevent drying out your nails.
Pastel Nails for Every Occasion
Pastel nail designs can be adapted for various settings:
- Office-appropriate: Opt for subtle designs like minimalist accents or pale French tips
- Special events: Go bold with intricate patterns or glittery accents
- Seasonal styles: Choose pastel shades that complement the current season
The Psychology of Pastel Colors
Pastel colors can have a significant impact on mood and perception. Here’s what different pastel shades might convey:
- Pale Pink: Nurturing, gentle, romantic
- Baby Blue: Calming, trustworthy, serene
- Mint Green: Fresh, natural, balanced
- Lavender: Creative, luxurious, mysterious
- Peach: Warm, sociable, optimistic
By choosing specific pastel shades for your nail art, you can subtly influence your mood and the way others perceive you.
Conclusion
Pastel nail art offers endless possibilities for self-expression and creativity. From minimalist designs to intricate patterns, there’s a pastel nail look for every style and occasion. By experimenting with different techniques and color combinations, you can create stunning nail art that brightens your day and boosts your confidence.
Remember, the key to great nail art is patience and practice. Don’t be afraid to try new things and let your creativity shine through your fingertips. Whether you’re a DIY enthusiast or prefer professional manicures, pastel nails are a beautiful way to add a touch of softness and elegance to your look.
So go ahead, pick up those pastel polishes, and let your imagination run wild. Your perfect pastel manicure awaits!

Sarah Williams is an experienced blogger and fashion enthusiast at Glammer Galaxy. With a passion for beauty and style, she shares expert insights on hair trends, nail art, and fashion tips. Her creative flair and years of experience make her a go-to source for all things glam!

