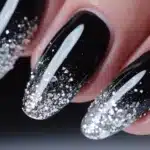
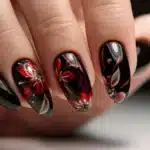
Acrylic nails have long been a favorite among those seeking a durable and versatile canvas for nail art. But can you really paint on top of these Acrylic Nails?
The answer is a resounding YES!
In this comprehensive guide, we’ll explore the world of acrylic nail art
Understanding Acrylic Nails: The Perfect Canvas
Before we look into the artistry, let’s get to know our canvas. Acrylic nails are a combination of a liquid monomer and a powder polymer that form a hard, protective layer over your natural nails. This durable surface is ideal for nail art, providing a smooth, long-lasting base for your creative endeavors.
Why choose acrylic nails for nail art?
- Durability: Acrylics can withstand more wear and tear than natural nails
- Versatility: They can be shaped and sized to your preference
- Longevity: Acrylic nails typically last 2-3 weeks, giving your art staying power
The Science Behind Acrylic Nails
Acrylic nails are created through a chemical reaction between the liquid monomer (usually ethyl methacrylate) and the powder polymer. When mixed, these components form a pliable substance that can be shaped over the natural nail. As it’s exposed to air, the mixture hardens, creating a strong, artificial nail extension.
This unique composition makes acrylic nails an excellent base for various types of nail art. The hardened surface provides stability for intricate designs, while its slightly porous nature allows for good paint adhesion.
Painting on Acrylic Nails: The Basics
Now that we understand our canvas, let’s talk paint. You have several options when it comes to decorating your acrylic nails:
- Nail polish: The most common choice, available in countless colors and finishes
- Acrylic paint: Offers vibrant colors and intricate detailing possibilities
- Gel polish: Provides a glossy, long-lasting finish
Each type of paint has its pros and cons. Here’s a quick comparison:
| Paint Type | Pros | Cons |
| Nail polish | Easy to apply, wide color range | Can chip easily |
| Acrylic paint | Versatile, great for detailed work | Requires sealing |
| Gel polish | Long-lasting, high-shine finish | Needs UV/LED curing |
Nail Polish on Acrylic Nails
Nail polish is the go-to choice for many due to its accessibility and ease of use. When applying nail polish to acrylic nails:
- Start with a thin base coat to help the color adhere better
- Apply 2-3 thin coats of your chosen color, allowing each layer to dry completely
- Finish with a top coat for added shine and protection
Pro Tip: Opt for high-quality nail polishes to ensure better coverage and longevity on acrylic nails.
Acrylic Paint for Detailed Designs
Acrylic paint is favored by nail artists for its versatility and ability to create intricate designs. When using acrylic paint:
- Thin the paint slightly with water if needed for smoother application
- Use fine-tipped brushes for detailed work
- Allow each layer to dry completely before adding more details
- Seal the design with a clear top coat to protect your artwork
Gel Polish: The Long-Lasting Option
Gel polish offers a durable, high-shine finish that can last for weeks. To use gel polish on acrylic nails:
- Apply a gel base coat and cure under a UV/LED lamp
- Add 2-3 thin layers of gel color, curing each layer
- Finish with a gel top coat and cure for a lasting shine
Read more interesting information about nails : Nail colors to complement black dress
Prepping Your Acrylic Nails for Art
Before you start painting, proper preparation is key. Follow these steps for the best results:
- Clean the nail surface with acetone or alcohol to remove any oils or residue
- Gently buff the surface to create a slightly rough texture for better paint adhesion
- Apply a base coat if using nail polish (skip this step for acrylic paint)
“Preparation is the key to success. The more you prepare, the more confident you will be.” – Sanya Richards-Ross
The Importance of a Clean Surface
Oils, dust, and residue can prevent paint from adhering properly to your acrylic nails. Use a lint-free wipe soaked in acetone or rubbing alcohol to thoroughly clean each nail. This step ensures that your nail art will have the best possible foundation.
Buffing: When and How
Lightly buffing the surface of your acrylic nails creates a slightly textured surface that helps paint adhere better. Use a fine-grit buffer (180-240 grit) and gently buff in one direction. Be careful not to over-buff, as this can weaken the acrylic structure.
Base Coat Considerations
When using nail polish, a base coat helps prevent staining and improves color adherence. For acrylic paint, you can skip the base coat and paint directly on the buffed acrylic surface. If using gel polish, apply a gel base coat and cure it before adding color.
Techniques for Painting on Acrylic Nails
Now comes the fun part – creating your masterpiece! Here are some popular techniques to try:
Brushwork Basics
Master these fundamental strokes:
- Thin lines for outlines and details
- Broad strokes for filling in larger areas
- Stippling for texture and shading
Brush Selection:
- Fine liner brushes (size 00 or 000) for intricate details
- Flat brushes for broader strokes and color blocking
- Fan brushes for blending and creating gradients
Dotting and Stippling
Create perfect dots using:
- Dotting tools
- The end of a bobby pin
- Toothpicks
Stippling technique:
- Dip your tool in paint
- Gently tap it onto the nail surface
- Vary the pressure for different-sized dots
Marbling and Water Decals
For a swirled, ethereal look:
- Drop different colors of polish into a cup of room-temperature water
- Swirl the colors with a toothpick
- Dip your nail into the design
- Clean up excess polish around the nail
Water decal application:
- Cut out the desired decal
- Soak in water for 10-15 seconds
- Slide the decal onto your nail
- Pat dry and seal with a top coat
Stamping on Acrylic Nails
For intricate patterns:
- Apply polish to a stamping plate
- Scrape off excess
- Pick up the design with a stamper
- Roll the stamper onto your nail
Stamping Tips:
- Use special stamping polishes for best results
- Clean your stamper and plates between uses
- Experiment with layering stamps for unique effects
3D Nail Art on Acrylics
Take your designs to the next level with:
- Rhinestones
- Pearls
- Charms
- Textured powders
Applying 3D Elements:
- Place a small dot of nail glue where you want the embellishment
- Use tweezers to carefully place the item
- Hold in place for a few seconds until secure
- Seal around the edges with a top coat for extra durability
Trending Designs to Try
Let’s explore some popular nail art trends that work beautifully on acrylic nails:
Mermaid Nail Art
Channel your inner sea goddess with these enchanting designs:
- Iridescent scales using stencils or freehand painting
- Ombré effects in ocean-inspired hues
- Seashell and starfish embellishments
Creating Mermaid Scales:
- Use a fishnet stocking or scale stencil over your base color
- Dab on metallic or iridescent polish
- Carefully remove the stencil
- Add glitter or holographic powder for extra shimmer
Rhinestone Nail Designs
Add some sparkle to your life:
- Accent nails with a full rhinestone coverage
- Geometric patterns using different sized stones
- Outlining French tips with a delicate rhinestone line
Rhinestone Application Techniques:
- Use a wax pencil or dotting tool to pick up and place stones
- Secure with a drop of nail glue or gel top coat
- Create patterns like chevrons, starbursts, or floral designs
- Mix crystal sizes and colors for depth and interest
Pearl Nails Designs
For an elegant, timeless look:
- Embed tiny pearls along the cuticle line
- Create a pearl-studded chevron pattern
- Mix pearls with rhinestones for a luxurious effect
Working with Pearls:
- Choose flat-backed pearls for easier application
- Use nail glue for secure attachment
- Create gradient effects by mixing pearl sizes
- Combine with metallic polish for a chic, modern look
Sealing Your Nail Art: Methods and Products
To ensure your masterpiece lasts, sealing is crucial. Here are your options:
Read interesting info about setting sprays alternatives here : Setting Spray Alternatives
Top Coat Options
- Regular nail polish top coat: Easy to apply, but may not be as durable
- Gel top coat: Provides a high-shine, long-lasting finish (requires UV/LED curing)
- Fast drying top coat: Quick-drying formula for those in a hurry
Comparing Top Coat Options
| Top Coat Type | Drying Time | Durability | Shine |
| Regular | 5-10 minutes | Moderate | Good |
| Gel | Instant (with curing) | High | Excellent |
| Fast-drying | 1-2 minutes | Moderate | Very Good |
Applying Top Coats Effectively
- Wait for your nail art to dry completely
- Apply a thin, even layer of top coat
- Cap the free edge of the nail to prevent chipping
- Allow to dry fully before exposing to water or pressure
DIY Nail Sealant Methods
For the crafty nail enthusiast:
- Glue and water mixture:
- Mix equal parts clear glue and water
- Apply a thin layer over your design
- Allow to dry completely
- Glue and sanitizer blend:
- Combine clear glue with a small amount of hand sanitizer
- Apply thinly and let dry
Pro Tip: Always test DIY sealants on a small area first to ensure compatibility with your nail art.
The Science of Sealants
Sealants work by creating a protective barrier over your nail art. They often contain film-forming agents like nitrocellulose or acrylates copolymer. These ingredients form a flexible, transparent layer that shields your design from water, oils, and abrasion.
Longevity of Nail Art on Acrylic Nails
How long will your masterpiece last? Several factors come into play:
- Quality of products used
- Proper sealing technique
- Daily wear and tear
- Hand care habits
On average, well-sealed nail art on acrylic nails can last 2-3 weeks. To extend the life of your design:
- Wear gloves for household chores
- Moisturize your hands and cuticles regularly
- Avoid excessive exposure to water
Factors Affecting Nail Art Durability
- Environmental factors: Exposure to water, heat, and chemicals
- Mechanical stress: Typing, texting, and other repetitive hand movements
- Natural nail growth: As your nails grow, it can affect the integrity of the design
Tips for Maintaining Your Nail Art
- Apply cuticle oil daily to keep the skin around your nails hydrated
- Use hand lotion regularly to prevent dryness and cracking
- Avoid using your nails as tools (e.g., opening cans or peeling stickers)
- Touch up small chips or wear with matching polish to extend the life of your design
Removing Nail Art from Acrylic Nails
When it’s time for a change, follow these steps:
- Soak a cotton pad in acetone-based nail polish remover
- Place the pad on your nail and wrap with aluminum foil
- Wait 10-15 minutes
- Gently scrape off the softened design with a wooden cuticle stick
- Buff the nail surface lightly to smooth out any remaining residue
Caution: Never peel off nail art, as this can damage your acrylic nails and natural nails underneath.
Safe Removal Techniques
- Use a non-acetone remover for designs without heavy glitter or 3D elements
- For stubborn designs, try a gel polish remover or soak-off solution
- Be patient and gentle to avoid damaging the acrylic surface
Post-Removal Nail Care
After removing your nail art:
- Hydrate your nails with cuticle oil
- Apply a nourishing hand cream
- Allow your nails to “breathe” for a few hours before applying new art
Troubleshooting Common Issues
Even the pros encounter hiccups. Here’s how to fix common problems:
Bubbles and Smudges
- Wait for each layer to dry completely before adding the next
- Apply thin coats to prevent bubbling
- Use a small brush dipped in acetone to carefully remove smudges
Preventing Bubbles:
- Roll the polish bottle between your hands instead of shaking
- Store polishes in a cool, dark place
- Apply polish in thin, even strokes
Chipped Designs
- Touch up small chips with matching polish or paint
- For larger chips, consider adding a strategic embellishment to cover the damage
Quick Fix for Chips:
- Clean the chipped area with alcohol
- Apply a small amount of matching polish with a fine brush
- Seal with a top coat once dry
Discoloration
- Use a good quality base coat to prevent staining
- Opt for lighter colors or apply white polish underneath vibrant shades
Dealing with Yellowing:
- Mix 1 part hydrogen peroxide with 2 parts baking soda
- Apply the paste to discolored nails
- Leave for 10-15 minutes, then rinse and moisturize
Do’s and Don’ts of Acrylic Nail Art
Follow these guidelines for the best results:
Do’s:
- Invest in quality brushes and tools
- Practice on nail wheels before attempting complex designs
- Allow adequate drying time between layers
- Experiment with different techniques and color combinations
- Keep your workspace clean and organized
Don’ts:
- Don’t rush the process – patience is key
- Avoid using too much product, which can lead to peeling
- Don’t skip the sealing step, even for simple designs
- Never use your painted acrylic nails to open packages or scratch surfaces
- Don’t ignore signs of allergic reactions or nail damage
You might also like : Toner turned my blonde hair brown
Case Study: Salon vs. DIY Acrylic Nail Art
To illustrate the differences between professional and at-home nail art, let’s look at a case study:
Sarah’s Salon Experience:
- Professional acrylic application with expert shaping
- Intricate hand-painted floral design using gel polish
- 3D elements added for texture (small crystals and pearls)
- High-gloss gel top coat for maximum shine and durability
- Total time: 2.5 hours
- Cost: $85
- Lasted 3 weeks with minimal chipping
Emily’s DIY Attempt:
- Self-applied acrylic nails using a kit
- Simple geometric design using regular nail polish
- Added rhinestones with nail glue
- Regular top coat for sealing
- Total time: 3 hours (including learning curve)
- Cost: $40 for supplies
- Lasted 1.5 weeks before noticeable wear
Key Takeaways:
- Professional application offers better longevity and precision
- DIY allows for more frequent changes and experimentation
- Both methods can produce beautiful results with practice
Acrylic Nail Paint Guide for Beginners :
FAQs
Q: Can you use regular acrylic paint on acrylic nails? A: Yes, but it must be sealed properly to prevent chipping and peeling. Use a nail-safe top coat designed for acrylic paint to ensure longevity.
Q: How often can I paint over my acrylic nails? A: It’s best to limit repainting to once every 1-2 weeks to prevent damage to the acrylic surface. Frequent painting and removing can weaken the acrylic structure.
Q: Will painting damage my acrylic nails? A: When done properly, painting shouldn’t damage your acrylics. Always use nail-safe products and follow proper techniques. Avoid harsh removers and excessive filing.
Conclusion
Painting on acrylic nails opens up a world of creative possibilities. With the right techniques, tools, and a bit of patience, you can transform your nails into miniature works of art. Whether you’re into classic French tips or daring 3D designs, acrylic nails provide the perfect canvas for your imagination.
Remember, practice makes perfect. Don’t be discouraged if your first attempts aren’t salon-worthy – even the most skilled nail artists started somewhere. Keep experimenting, have fun, and soon you’ll be creating stunning nail art that turns heads and sparks conversations.

Sarah Williams is an experienced blogger and fashion enthusiast at Glammer Galaxy. With a passion for beauty and style, she shares expert insights on hair trends, nail art, and fashion tips. Her creative flair and years of experience make her a go-to source for all things glam!

