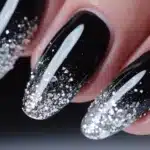
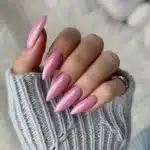
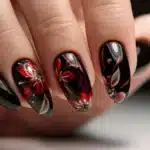
Oval nails designs have taken the beauty world by storm, and it’s easy to see why. Their elegant shape elongates fingers and provides the perfect canvas for a wide array of nail art.
Let’s get started with oval nail artistry and discover the perfect look for every occasion.
The Allure of Oval Nails
Oval nails have become a favorite among nail enthusiasts and celebrities alike. Their soft, feminine shape offers a timeless elegance that suits any style. But what makes oval nails so special?
- Versatility: Oval nails complement various nail lengths and hand shapes.
- Elegance: The elongated silhouette creates a graceful appearance.
- Canvas potential: The shape provides ample space for intricate nail art designs.
“Oval nails are the little black dress of nail shapes – they never go out of style and suit everyone,” says celebrity nail artist Marian Newman.
Now, let’s explore the stunning oval nail designs that will have you rushing to your nearest nail salon or reaching for your DIY nail kit.
Classic Reinvented: Timeless Oval Nail Designs
Modern French Tips with a Twist
The classic French manicure gets a contemporary upgrade with oval nails. This timeless design now comes in various creative interpretations:
- Colored Tips: Replace white with bold hues or pastels.
- Glitter Line: Add a thin line of glitter between the nail bed and tip.
- Double French: Create two parallel lines at the tip for a unique look.
French Oval Nail Designs have evolved to include ombre effects, metallic accents, and even negative space elements. Try a reverse French manicure by painting the moon of your nail instead of the tip for a fresh take on this classic style.
Nude and Pastel Perfection
Nude and pastel shades on oval nails exude sophistication and pair well with any outfit. Try these variations:
- Gradient Nude: Blend two or three nude shades for a subtle ombre effect.
- Pastel Blocking: Use tape to create geometric shapes with soft pastel colors.
- Negative Space: Incorporate clear sections into your nude or pastel design for a modern touch.
For a chic and professional look, opt for a single nude shade that complements your skin tone. This timeless style elongates the fingers and gives a polished appearance suitable for any occasion.
Metallic Marvels: Shimmering Oval Nail Art
Rose Gold and Copper Dreams
Metallic oval nail designs add instant glamour to any look. Rose gold and copper tones are particularly flattering and on-trend.
DIY Rose Gold Nails:
- Apply a base coat
- Paint nails with a rose gold polish
- Add copper accents using a thin brush
- Seal with a top coat for lasting shine
For an extra touch of luxury, try incorporating foil flakes or a chrome powder on accent nails. This creates a stunning contrast and adds depth to your metallic manicure.
Chrome Effects and Mirror Finishes
For a futuristic look, try chrome or mirror-finish oval nails. These eye-catching designs reflect light beautifully and make a bold statement.
Pro Tip: For the best chrome effect, use a gel polish base and apply chrome powder with a sponge applicator. Buff gently to achieve a smooth, reflective surface.
Experiment with different colored chrome powders to create unique effects, such as oil slick or unicorn chrome nails. These finishes are perfect for special events or when you want your nails to be the center of attention.
Nature-Inspired Beauties
Delicate Floral Patterns
Floral oval nail art brings a touch of nature to your fingertips. From dainty daisies to intricate roses, the possibilities are endless.
Popular Floral Designs:
- Cherry blossoms for a Japanese-inspired look
- Sunflowers for a cheerful summer vibe
- Lavender sprigs for a calming, aromatic feel
To create realistic floral designs, use a fine detail brush and build up layers of color. Start with a light base and add darker shades for depth and dimension. Don’t forget to add small details like pollen centers or leaf veins for added realism.
Earthy Stone and Agate-Inspired Designs
Marble effect oval nail designs and agate-inspired patterns bring a touch of luxury to your manicure. These designs mimic the natural beauty of stones and can be created with various techniques:
- Water marbling
- Gel polish swirling
- Stamping with specialized plates
For a unique twist, try combining marble effects with metallic accents or negative space designs. This creates a modern, sophisticated look that’s perfect for both casual and formal occasions.
See Also : 16 Nails Color Look Awesome With Emerald Green Dress?
Geometric Wonders: Lines, Shapes, and Symmetry
Minimalist Line Art
Geometric oval nail patterns can be both simple and striking. Minimalist line art is perfect for those who prefer a clean, modern aesthetic.
Ideas for Minimalist Geometric Nails:
- Single diagonal line across each nail
- Intersecting triangles
- Negative space hexagons
Use striping tape or a thin brush to create crisp, clean lines. Experiment with different color combinations, such as black on nude or metallic on matte, for various effects.
Bold Color-Blocking Techniques
For a more dramatic look, try color-blocking on your oval nails. This technique involves using bold, contrasting colors to create geometric shapes.
Color-Blocking Tips:
- Use nail tape for crisp lines
- Experiment with complementary colors
- Try asymmetrical designs for added interest
Don’t be afraid to mix and match different geometric shapes and colors across your nails. This creates a cohesive yet dynamic look that’s sure to turn heads.
Texture Play: 3D and Tactile Designs
Velvet Nails: The Latest Sensation
Velvet nails are taking the nail art world by storm. This plush, tactile finish adds depth and luxury to oval nails.
How to Create Velvet Nails:
- Apply a base color
- Sprinkle velvet powder over wet polish
- Gently pat down and remove excess
- Seal with a matte top coat
Experiment with different base colors to create unique velvet effects. Dark colors like deep blue or burgundy create a rich, luxurious look, while pastels offer a softer, more delicate appearance.
Embossed and Raised Patterns
3D nail art adds an extra dimension to your manicure. Embossed patterns and raised designs create a unique tactile experience.
Popular 3D Nail Art Techniques:
- Acrylic sculpting
- Gel embossing
- Nail charms and studs
For a sophisticated 3D look, try creating raised geometric patterns using clear gel. This adds texture without overwhelming the overall design.
Out of This World: Celestial and Galaxy Nails
Starry Night Inspirations
Galaxy oval nails are perfect for those who dream of the cosmos. These designs typically feature swirling nebulas, twinkling stars, and cosmic color combinations.
Galaxy Nail Art Tutorial:
- Start with a black base
- Sponge on various shades of blue, purple, and pink
- Add white dots for stars using a dotting tool
- Apply a holographic top coat for extra sparkle
To enhance your galaxy nails, consider adding small rhinestones or glitter to represent distant stars or planets. This adds depth and dimension to your cosmic design.
Aurora Borealis Effects
Capture the magic of the Northern Lights on your oval nails with aurora borealis-inspired designs.
Aurora Borealis Nail Art Technique:
- Use sheer, iridescent polishes
- Layer colors to create a shifting effect
- Add fine glitter for a magical touch
Experiment with different color combinations to recreate various aurora effects. Green and purple are classic choices, but don’t be afraid to incorporate blues, pinks, and even yellows for a unique interpretation.
Explore this interesting article too : 35 Coral Nail Designs for a Gorgeous Summer Look
Cultural Flair: Ethnic-Inspired Nail Art
Tribal Patterns with a Modern Twist
Tribal-inspired oval nail art combines traditional patterns with contemporary color schemes and techniques.
Modern Tribal Nail Design Ideas:
- Geometric tribal patterns in neon colors
- Metallic accents on matte tribal designs
- Negative space tribal art
Research authentic tribal patterns from various cultures for inspiration, but be respectful in your interpretations. Focus on geometric elements and bold color combinations to create a modern tribal look.
Mandala and Henna-Inspired Designs
Intricate mandala and henna-inspired patterns add a bohemian touch to oval nails.
Tips for Creating Mandala Nail Art:
- Use a fine-tipped nail art brush or pen
- Start from the center and work outwards
- Practice symmetry for a balanced design
For a more authentic henna-inspired look, use a warm, reddish-brown polish as your base color. Add intricate designs in white or gold for a stunning contrast.
Gradient Gorgeousness: Ombre and Beyond
Sunset-Inspired Color Transitions
Ombre oval nail designs mimic the beautiful color transitions of a sunset, creating a warm and inviting look.
Sunset Ombre Nail Tutorial:
- Apply a white base
- Sponge on yellow, orange, and pink polishes
- Blend colors for a seamless transition
- Add silhouette details for a tropical vibe
To enhance your sunset ombre, consider adding small palm tree silhouettes or seagull shapes in black. This creates a picturesque scene on your nails.
Glitter Gradients for Extra Sparkle
For those who love a bit of sparkle, glitter gradient nails are the perfect choice.
Glitter Gradient Technique:
- Start with a solid base color
- Apply glitter polish at the tip, fading towards the cuticle
- Use a makeup sponge for a smooth transition
Experiment with different glitter sizes and colors to create unique effects. Mix fine and chunky glitters for added dimension and interest.
Tropical Paradise on Your Fingertips
Palm Leaves and Flowers
Bring vacation vibes to your oval nails with tropical oval nail designs featuring palm leaves, hibiscus flowers, and fruits.
Tropical Nail Art Ideas:
- Watercolor palm leaves on a pastel background
- Hibiscus flower accent nails
- Pineapple patterns for a fun summer look
Use a small detail brush to create realistic leaf veins and flower petals. For a more abstract look, try using watercolor techniques to create soft, blended tropical motifs.
Fruit-Inspired Fun
Fruity nail art is perfect for adding a pop of color and whimsy to your oval nails.
Popular Fruit Nail Designs:
- Watermelon slices
- Citrus wedges
- Strawberry patterns
To make your fruit designs pop, consider using a white or light-colored base. This allows the vibrant fruit colors to stand out and creates a fresh, summery look.
Polka Perfection: Dots Done Right
Negative Space Dot Designs
Polka dot oval nail art gets a modern update with negative space designs.
Negative Space Polka Dot Tutorial:
- Apply base coat
- Place circular stickers on nails
- Paint over with desired color
- Remove stickers while polish is wet
- Seal with top coat
Experiment with different dot sizes and arrangements to create unique patterns. Try combining dots with other geometric shapes for a more complex design.
Multicolored Confetti Nails
For a fun and festive look, try multicolored confetti-inspired polka dots on your oval nails.
Confetti Nail Art Technique:
- Use a dotting tool to create dots of various sizes
- Experiment with different color combinations
- Add metallic dots for extra sparkle
To create a more realistic confetti look, try using a small brush to add tiny lines or irregular shapes along with the dots. This mimics the appearance of actual paper confetti.
Watercolor Wonders
Soft, Dreamy Pastel Blends
Watercolour oval nail designs create a soft, ethereal look perfect for spring and summer.
Watercolor Nail Art Steps:
- Apply a white base
- Drop small amounts of diluted polish onto the nail
- Blend colors with a small brush or sponge
- Seal with a glossy top coat
For best results, use alcohol-based inks or very thin nail polish. This allows for easier blending and creates a more authentic watercolor effect.
Abstract Watercolor Techniques
Take your watercolor nails to the next level with abstract designs and bold color combinations.
Abstract Watercolor Nail Ideas:
- Marble-like swirls in contrasting colors
- Splatter technique for a Jackson Pollock-inspired look
- Geometric shapes filled with watercolor effects
Don’t be afraid to mix unconventional colors or create asymmetrical designs. The beauty of abstract watercolor nails lies in their unique, artistic appearance.
Glitz and Glam: All That Glitters
Foil Accents and Sparkle
Add some pizzazz to your oval nails with foil accents and strategically placed glitter.
Foil Nail Art Technique:
- Apply a sticky base coat
- Press foil onto the nail
- Gently peel off the backing
- Seal with top coat
Experiment with different foil colors and patterns. Try combining foil with negative space designs or using it to create abstract shapes on your nails.
Full-Coverage Glitter Designs
For maximum sparkle, try full-coverage glitter on your oval nails.
Tips for Perfect Glitter Nails:
- Use a peel-off base coat for easy removal
- Apply thin layers of glitter polish for even coverage
- Seal with a thick top coat for a smooth finish
Mix different sizes and colors of glitter for a multi-dimensional effect. Consider creating an ombre effect with glitter, fading from full coverage to sparse for a unique look.
Seasonal Sensations
Cherry Blossoms for Spring
Celebrate the arrival of spring with delicate cherry blossom designs on your oval nails.
Cherry Blossom Nail Art Tutorial:
- Paint a light pink or nude base
- Use a thin brush to create branches
- Add pink and white dots for blossoms
- Finish with small yellow centers
For added realism, try using a dotting tool to create small pink buds alongside the fully bloomed flowers. This adds depth and variety to your cherry blossom design.
Cozy Sweater Nails for Fall
Bring the comfort of your favorite sweater to your nails with textured, cozy designs.
Sweater Nail Art Technique:
- Use a thin brush to create cable knit patterns
- Add matte top coat for a realistic texture
- Incorporate warm, autumnal colors
Experiment with different knit patterns like braids or honeycomb textures. You can also add small embellishments like rhinestones to mimic buttons or brooches.
For more nail paint ideas read this post : 17 Stunning Butterfly Nail Art Designs to Enhance Your Manicure
Neon Nights: Bold and Bright
Electric Ombre Effects
Make a statement with neon ombre oval nails that transition between vibrant, electric hues.
Neon Ombre Nail Steps:
- Start with a white base
- Sponge on neon colors, overlapping slightly
- Blend for a seamless transition
- Add a matte top coat for a modern twist
To make your neon colors truly pop, consider using a white or neon yellow base coat. This helps the bright shades stand out and appear more vivid.
Neon Geometric Patterns
Combine the boldness of neon colors with sharp geometric shapes for a show-stopping manicure.
Neon Geometric Nail Ideas:
- Neon triangles on a black background
- Color-blocked neon designs
- Negative space neon patterns
For a unique twist, try combining neon shades with pastel or nude colors. This creates an interesting contrast and makes the neon elements stand out even more.
Lace and Delicates
3D Lace Appliqués
Add a touch of romance to your oval nails with 3D lace appliqués.
How to Apply 3D Lace:
- Paint nails with a base color
- Cut lace into desired shapes
- Apply lace using nail glue
- Seal with a clear top coat
For a more subtle lace effect, try using white or cream-colored lace on a nude base. This creates an elegant, bridal-inspired look.
Negative Space Lace Patterns
For a more subtle lace effect, try negative space lace patterns on your oval nails.
Negative Space Lace Tutorial:
- Apply lace or mesh material to nails
- Paint over with desired color
- Carefully remove lace while polish is wet
- Add details with a thin brush if needed
Experiment with different lace patterns and color combinations. Try a bold color over a nude base for a modern take on lace nails.
Matte Magic
Matte and Glossy Combinations
Create visual interest by combining matte and glossy finishes on your oval nails.
Matte and Glossy Nail Art Ideas:
- Matte base with glossy tips
- Alternating matte and glossy nails
- Glossy patterns on a matte background
Try creating intricate patterns using matte and glossy top coats over a single color. This creates a subtle yet eye-catching design.
Textured Matte Finishes
Experiment with textured matte finishes for a unique tactile experience.
Textured Matte Nail Techniques:
- Use textured nail polish for an all-over effect
- Create patterns with matte top coat over regular polish
- Combine matte textures with smooth matte finishes
For an elegant look, try a matte velvet effect using specialized powders or polishes. This creates a soft, luxurious appearance perfect for special occasions.
Pop Culture on Your Nails
Minimalist Cartoon Character Outlines
Pay homage to your favorite characters with minimalist outline designs on your oval nails.
Character Outline Nail Art Steps:
- Paint a solid base color
- Use a thin brush to draw character outlines
- Fill in details as desired
- Seal with a top coat
Choose iconic characters with easily recognizable silhouettes for the best results. Consider using pastel or muted colors for a more subtle, grown-up take on cartoon nails.
Comic Book-Inspired Nail Art
Bring the bold graphics of comic books to your nails with pop art-inspired designs.
Comic Book Nail Art Ideas:
- Onomatopoeia words (POW!, BAM!, ZOOM!)
- Ben-Day dot patterns
- Bold black outlines and bright colors
For an authentic comic book look, use primary colors and create small black dots to mimic the printing process used in vintage comics.
Futuristic Finishes
Holographic and Iridescent Effects
Create otherworldly oval nail designs with holographic and iridescent finishes.
Holographic Nail Techniques:
- Use holographic nail powder over gel polish
- Apply holographic nail foils
- Layer iridescent top coats for a subtle effect
Experiment with different base colors under your holographic effect. Dark bases create a more dramatic look, while light bases allow the holographic effect to shine.
Magnetic Cat-Eye Designs
Cat-eye nails create a mesmerizing, dimensional effect on oval nails.
Cat-Eye Nail Art Tutorial:
- Apply magnetic nail polish
- Hold a magnet near the nail while polish is wet
- Move the magnet to create desired patterns
- Seal with a top coat
Try combining cat-eye effects with other nail art techniques, such as gradients or negative space designs, for a unique and eye-catching look.
Print Perfection
Retro Newspaper and Magazine Clippings
Bring a vintage vibe to your oval nails with newspaper and magazine print designs.
Newspaper Print Nail Art Steps:
- Paint nails with a light base color
- Dip nails in alcohol
- Press newspaper clippings onto nails
- Seal with a top coat
For a more colorful look, try using magazine clippings instead of newspaper. This allows you to incorporate vibrant images and text into your nail design.
Gingham, Plaid, and Check Patterns
Classic print patterns like gingham and plaid look charming on oval nails.
Gingham Nail Art Technique:
- Paint a base color
- Use striping tape to create a grid
- Fill in alternating squares
- Remove tape and add a top coat
Experiment with different color combinations and scale of patterns. Micro-gingham can create a delicate, feminine look, while larger checks offer a bold, retro vibe.
Conclusion: Expressing Yourself Through Nail Art
With these 20 stunning oval nail designs, you can express your style and creativity. Remember, nail art is about having fun and experimenting with different techniques and designs.
Here are some final tips for maintaining your oval nail masterpieces:
- Always use a base coat to protect your nails
- Apply a quality top coat to seal your design and add shine
- Moisturize your cuticles regularly to keep your nails healthy
- Be gentle with your nails to avoid chips and cracks
- Touch up your design as needed to keep it looking fresh

Sarah Williams is an experienced blogger and fashion enthusiast at Glammer Galaxy. With a passion for beauty and style, she shares expert insights on hair trends, nail art, and fashion tips. Her creative flair and years of experience make her a go-to source for all things glam!

