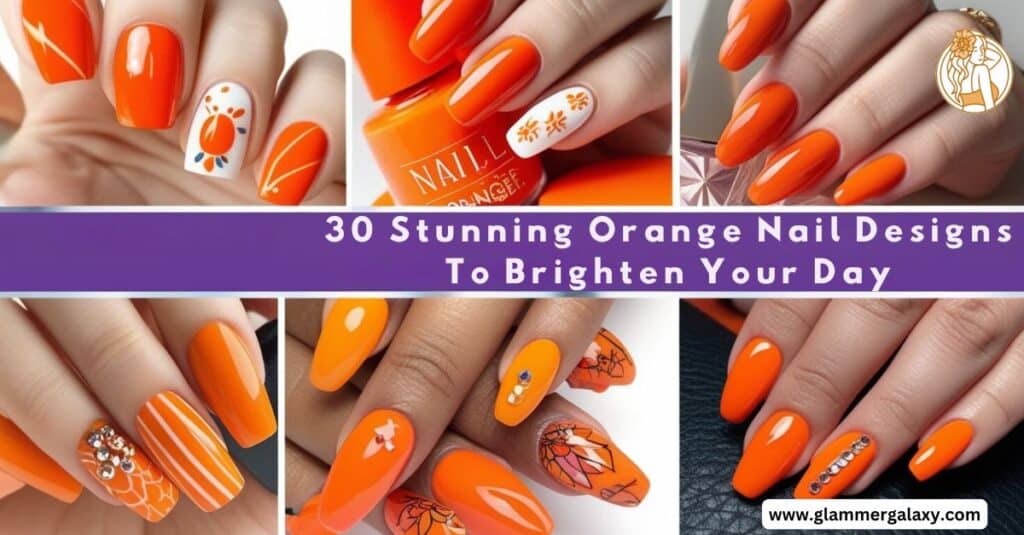
Orange nail designs have taken the beauty world by storm, offering a vibrant and versatile option for those looking to add a pop of color to their fingertips.
From classic shades to neon hues, orange nails can suit any style or occasion. In this comprehensive guide, we’ll explore 30 stunning orange nail designs that are sure to brighten your day and elevate your manicure game.
The Power of Orange in Nail Art
Orange is a color that commands attention. It’s warm, energetic, and associated with creativity and enthusiasm. In the realm of nail art
The history of orange in fashion and beauty is rich and varied. In ancient Egypt, henna was used to create orange-tinted designs on hands and nails. Fast forward to the 1960s and 70s, when orange became a symbol of counterculture and free spirit.
Today, orange nail designs are embraced by fashionistas and nail art enthusiasts alike, offering a fresh and modern take on personal style.
Classic Orange Nail Designs with a Twist
Burnt Orange for a Sophisticated Look
Burnt orange nail designs offer a sophisticated and versatile option for those who want to embrace the orange trend without going too bold. This deep, rich shade pairs well with both casual and formal attire.
Tips for achieving the perfect burnt orange manicure:
- Start with a base coat to protect your nails
- Apply two thin coats of burnt orange polish for even coverage
- Finish with a high-shine top coat for a glossy look
Creamsicle-Inspired Designs
Who doesn’t love a creamsicle? These nostalgic orange nail designs combine soft orange hues with creamy white for a sweet and playful look.
Creamsicle nail art ideas:
- Orange and white swirls
- Ombre effect from white to orange
- Orange base with white polka dots
Terracotta Tones for Earthy Vibes
Terracotta orange nails offer a more subdued option that’s perfect for fall or those who prefer earthy tones. This warm, rusty shade complements a variety of skin tones and outfits.
Terracotta nail design suggestions:
- Matte terracotta finish
- Terracotta and gold leaf accents
- Geometric patterns in various terracotta shades
Modern Takes on Orange French Tips
Inverted French with Neon Orange
Give the classic French manicure a modern twist by inverting the design and using neon orange for a bold pop of color. This eye-catching look is perfect for summer or any time you want to make a statement.
Steps for creating inverted neon orange French tips:
- Apply a neutral base color
- Use nail tape to create a curved line at the base of your nail
- Paint neon orange below the tape
- Remove the tape and seal with a top coat
Wavy French Tips in Pastel Orange
For a softer approach to orange French tips, try a wavy design in pastel orange. This playful yet elegant look is ideal for spring and summer.
Pastel orange wavy French tip ideas:
- Combine with other pastel shades for a rainbow effect
- Add small floral designs for extra charm
- Use a metallic pastel orange for a touch of shimmer
Negative Space French Manicure
Incorporate orange into a negative space French manicure for a modern and minimalist look. This design leaves portions of the natural nail visible, creating an interesting contrast with the orange polish.
Negative space orange French manicure techniques:
- Use nail stencils for precise lines
- Experiment with different geometric shapes
- Try an ombre effect within the negative space
Bold and Beautiful: Neon Orange Nails
Full Neon Orange Coverage
For the boldest of the bold, try a full coverage neon orange manicure. This look is not for the faint of heart but is sure to turn heads and brighten any outfit.
Tips for working with neon orange polish:
- Apply a white base coat to make the neon color pop
- Use thin coats to prevent streaking
- Seal with a UV-resistant top coat to prevent fading
Neon Orange Accents on Neutral Base
If full neon coverage feels too intense, try incorporating neon orange accents on a neutral base. This creates a balanced look that’s both eye-catching and sophisticated.
Neon orange accent ideas:
- Thin stripes or geometric shapes
- Small dots or stars
- Abstract brushstrokes
Glow-in-the-Dark Neon Orange Designs
Take your neon orange nails to the next level with glow-in-the-dark polish. This fun and unexpected twist is perfect for parties or nights out.
Creating glow-in-the-dark neon orange nails:
- Apply a neon orange base
- Add glow-in-the-dark top coat
- Charge under light before heading out
See also : Nail color options with purple dress
Marble Madness: Orange and White Swirls
Water Marble Technique
The water marble technique creates unique, swirling patterns that combine orange and white for a mesmerizing effect. Each nail becomes a work of art with this method.
Steps for water marble nails:
- Fill a cup with room temperature water
- Drop alternating colors of polish onto the water surface
- Use a toothpick to create swirls
- Dip your nail into the design
- Clean up excess polish and add a top coat
Dry Marble with Orange and White
For those who find water marbling too messy, dry marbling offers a similar effect with less cleanup. This technique involves swirling polish directly on the nail.
Dry marble tips:
- Work quickly before the polish dries
- Use a thin brush or toothpick for intricate designs
- Experiment with different orange shades for depth
Geode-Inspired Orange Marble
Combine orange marble effects with crystal-inspired designs for a geode look. This trendy nail art style incorporates different shades of orange with metallic accents.
Creating geode-inspired orange nails:
- Use a sponge to create a base of various orange shades
- Add white or gold “crystal” accents
- Finish with a clear, sparkly top coat
Geometric Orange Nail Art
Triangular Patterns in Various Orange Shades
Geometric designs are a staple of modern nail art, and orange provides the perfect canvas for these bold shapes. Triangular patterns in different orange hues create a dynamic and eye-catching look.
Ideas for triangular orange nail art:
- Ombre effect within each triangle
- Alternate matte and glossy finishes
- Incorporate negative space for contrast
Chevron Designs with Metallic Accents
Chevron patterns are classic and versatile. When combined with orange and metallic accents, they create a nail design that’s both trendy and timeless.
Chevron nail art techniques:
- Use nail tape for crisp lines
- Try a double chevron for added interest
- Experiment with different metallic shades
Cubist-Inspired Orange Nail Art
Draw inspiration from cubist art to create abstract, geometric designs in various shades of orange. This avant-garde look is perfect for the artistically inclined.
Cubist nail art tips:
- Use thin brushes for precise lines
- Incorporate complementary colors for depth
- Don’t worry about perfection – embrace the abstract!
Glitz and Glam: Orange Glitter Nails
Ombre Glitter Effect
Create a stunning gradient effect by combining orange polish with orange glitter. This glamorous look is perfect for special occasions or when you want to add some sparkle to your day.
Steps for ombre glitter nails:
- Apply an orange base coat
- Sponge on glitter polish, concentrating on the tips
- Gradually blend the glitter towards the cuticle
- Seal with a thick top coat for a smooth finish
Chunky Glitter Placement
For a more dramatic glitter look, try placing larger glitter pieces strategically on an orange base. This allows for more control over the design and creates a unique, textured effect.
Chunky glitter placement ideas:
- Create a glitter gradient from cuticle to tip
- Apply glitter in geometric shapes
- Use glitter to accent specific nails in a manicure
Fine Glitter in Jelly Orange Base
Combine the trend of jelly nails with fine orange glitter for a sparkling, translucent effect. This creates depth and dimension in your nail design.
Creating jelly glitter nails:
- Apply a sheer orange base
- Mix fine glitter into a clear top coat
- Apply multiple layers, allowing each to dry between coats
- Finish with a high-shine top coat
Luxe Look: Orange and Gold Foil Nails
Gold Leaf on Orange Base
Add a touch of luxury to your orange nails with gold leaf accents. This elegant combination is perfect for formal events or when you want to feel extra glamorous.
Applying gold leaf to nails:
- Paint nails with orange polish and allow to dry completely
- Apply a thin layer of nail glue where you want the gold leaf
- Carefully place gold leaf onto the glue
- Gently brush away excess gold leaf
- Seal with a top coat
Orange Foil on Nude Nails
For a more subtle approach to orange and gold, try applying orange foil to a nude base. This creates a chic, minimalist look with a pop of color.
Orange foil nail art ideas:
- Create abstract patterns with torn foil pieces
- Apply foil in geometric shapes for a modern look
- Use foil to create delicate floral designs
Mixed Metal Foils with Orange
Combine orange polish with various metallic foils for a truly eye-catching design. This eclectic mix of colors and textures creates a unique and luxurious manicure.
Mixed metal and orange nail design suggestions:
- Create a mosaic effect with different foil colors
- Use foils to accent specific nails in an orange manicure
- Combine foils with negative space designs
Abstract Orange Nail Designs
Brushstroke Technique
The brushstroke technique creates fluid, artistic designs that look like they’ve been painted on canvas. Use various shades of orange for a dynamic and expressive nail art look.
Tips for brushstroke nail art:
- Use a thin brush or nail art brush for precise strokes
- Vary the pressure to create different line widths
- Don’t aim for perfection – embrace the artistic imperfections
Splatter Paint Effect
Channel your inner Jackson Pollock with a splatter paint effect on your nails. This fun and energetic design is perfect for those who love a more abstract, artistic look.
Creating splatter paint nails:
- Apply a base coat in white or a light orange
- Use a straw to blow drops of orange polish onto your nails
- Repeat with different shades of orange
- Clean up excess polish around the nail
- Seal with a top coat
Watercolor-Inspired Abstract Designs
Soft, dreamy watercolor effects can be achieved on nails using orange and complementary colors. This technique creates a delicate and artistic manicure.
Watercolor nail art techniques:
- Apply a white base coat
- Use highly diluted nail polish or actual watercolor paints
- Blend colors while still wet for a true watercolor effect
- Seal with a water-resistant top coat
Blooming Beauty: Floral Orange Nail Designs
Orange Poppies and Daisies
Bring a touch of nature to your nails with orange floral designs. Poppies and daisies in various orange hues create a cheerful and feminine look.
Floral nail art tips:
- Use a dotting tool to create flower centers
- Practice petal shapes on paper before attempting on nails
- Add small green leaves for a realistic touch
Tropical Flowers in Sunset Hues
Embrace a tropical vibe with nail art featuring flowers in warm orange tones. This design is perfect for summer or vacation-themed manicures.
Tropical flower nail ideas:
- Hibiscus flowers in bright orange
- Bird of paradise designs with orange accents
- Plumeria flowers in soft peach tones
Minimalist Floral Outlines in Orange
For a more subtle floral look, try minimalist outline designs in orange. This modern take on floral nail art is both elegant and eye-catching.
Creating minimalist floral nails:
- Apply a neutral base coat
- Use a thin brush to draw simple flower outlines in orange
- Add small details like centers or leaves if desired
- Seal with a matte top coat for a contemporary finish
Citrus-Inspired Orange Nails
Orange Slice Nail Art
Bring a slice of citrus to your fingertips with orange slice nail art. This fun and fruity design is perfect for summer and adds a playful touch to any outfit.
Orange slice nail art steps:
- Paint nails with a white base
- Use a thin brush to create orange semicircles
- Add white lines for the fruit segments
- Outline with a darker orange for definition
- Finish with a glossy top coat
Textured Peel Effect
Create a unique textured look by mimicking the peel of an orange on your nails. This 3D effect adds depth and interest to your manicure.
Creating a textured peel effect:
- Apply an orange base coat
- Use a textured polish or add fine sand to clear polish
- Apply the textured mixture in a peel-like pattern
- Seal with a matte top coat for a realistic look
Mixed Citrus Fruit Designs
Why stop at oranges? Incorporate other citrus fruits like lemons and grapefruits for a colorful and refreshing nail design.
Mixed citrus nail art ideas:
- Create an accent nail with different citrus slices
- Use various shades of yellow, orange, and pink for a citrus rainbow
- Add small green leaves for a botanical touch
You might like reading : Nail Color Ideas with Blue Dress
Matte Magic: Orange Nail Designs
Velvet Matte Finish
A velvet matte finish gives orange nails a soft, luxurious look. This sophisticated style works well with both bright and muted orange shades.
Achieving a velvet matte finish:
- Apply your chosen orange polish
- Allow to dry completely
- Use a matte top coat for a velvety effect
- For extra texture, try a “flocking powder” designed for nails
Matte and Glossy Combinations
Create visual interest by combining matte and glossy finishes in your orange nail design. This contrast adds depth and dimension to your manicure.
Matte and glossy design ideas:
- Matte base with glossy tips
- Alternating matte and glossy stripes
- Glossy geometric shapes on a matte background
3D Texture with Matte Orange
Take your matte orange nails to the next level with 3D textures. This avant-garde look combines the sophistication of matte polish with eye-catching raised designs.
Creating 3D textured nails:
- Use a thick orange gel polish to create raised patterns
- Cure under a UV lamp between layers
- Finish with a matte top coat for a uniform look
Jelly Orange Nails: Translucent Trends
Layered Jelly Technique
Jelly nails offer a unique, translucent effect that’s both modern and playful. Layering different shades of orange jelly polish creates depth and dimension.
Layered jelly nail steps:
- Start with a clear base coat
- Apply thin layers of orange jelly polish, allowing each to dry
- Alternate between lighter and darker shades for depth
- Finish with a high-shine top coat
Jelly Sandwich Designs
The jelly sandwich technique involves “sandwiching” glitter or other nail art elements between layers of jelly polish. This creates a floating effect that’s truly mesmerizing.
Jelly sandwich ideas:
- Encapsulate orange glitter between jelly layers
- Create a gradient effect with different orange jelly shades
- Add small dried flowers for a natural touch
Negative Space with Jelly Orange
Combine the trendy negative space technique with jelly orange polish for a modern and minimalist look. This design leaves portions of the natural nail visible for an interesting contrast.
Negative space jelly nail art:
- Use nail tape to create geometric shapes
- Apply jelly polish around the tape
- Remove tape and seal with a top coat
Swirl and Twirl: Orange Nail Art
Psychedelic Swirls in Multiple Oranges
Channel the groovy vibes of the 60s and 70s with psychedelic swirl designs in various shades of orange. This fun and energetic look is perfect for those who love retro style.
Creating psychedelic swirls:
- Apply a light orange base
- Use a thin brush to create swirling patterns in darker orange shades
- Add white or yellow accents for contrast
- Seal with a glossy top coat for a authentic retro look
Marbled Swirl Effect
Create a sophisticated marbled swirl effect using different shades of orange. This elegant design mimics the look of natural stone for a luxurious manicure.
Marbled swirl technique:
- Drop different shades of orange polish onto a silicone mat
- Swirl the colors together with a toothpick
- Press a stamper into the design and transfer to your nail
- Clean up edges and add a top coat
3D Swirl Designs
Take your swirl designs to the next level with 3D effects. This advanced technique creates raised swirls that add texture and visual interest to your nails.
Creating 3D swirls:
- Use a thick gel polish or acrylic paint
- Create swirls with a fine brush or toothpick
- Build up layers for a truly 3D effect
- Cure between layers if using gel polish
Give this interesting article a read too : Paint on Acrylic Nails
Spooky and Stylish: Halloween Orange Nails
Jack-o’-Lantern Inspired Designs
Embrace the Halloween spirit with jack-o’-lantern inspired nail art. These playful designs are perfect for October but can be worn any time you want to add a touch of whimsy to your look.
Jack-o’-lantern nail art ideas:
- Create simple faces on an orange base
- Use black polish for outlines and details
- Add a gradient effect for a glowing pumpkin look
Candy Corn Nail Art
Pay homage to the classic Halloween treat with candy corn inspired nails. This design combines orange with white and yellow for a sweet and festive look.
Candy corn nail steps:
- Apply a white base to the tip of the nail
- Add an orange stripe in the middle
- Fill in the base with yellow
- Use a thin brush to clean up lines between colors
- Finish with a glossy top coat
Subtle Halloween Hints in Orange
For those who prefer a more understated Halloween look, incorporate subtle spooky elements into your orange nail design. This allows you to embrace the holiday spirit in a chic and sophisticated way.
Subtle Halloween nail ideas:
- Small ghost or bat silhouettes on an orange base
- Orange and black geometric patterns
- Metallic orange with black web designs
| Design | Description | Steps/Ideas |
|---|---|---|
| Jack-o’-Lantern Inspired Designs | Playful pumpkin faces perfect for Halloween or a whimsical touch year-round. | Create faces on orange base, black outlines, gradient glow |
| Candy Corn Nail Art | Festive candy corn design combining orange, white, and yellow for a sweet look. | White base, orange stripe, yellow tip, glossy top coat |
| Subtle Halloween Hints in Orange | Understated Halloween designs for a chic, spooky vibe with orange accents. | Ghost/bat silhouettes, geometric patterns, black web art |
Tropical Paradise: Orange Nail Ideas
Sunset Gradient Nails
Capture the beauty of a tropical sunset with a gradient nail design. This look blends various shades of orange with pinks and purples for a stunning ombre effect.
Creating sunset gradient nails:
- Apply a white base coat
- Use a makeup sponge to dab on layers of polish, starting with the lightest shade
- Blend colors while still wet
- Clean up around the edges and add a top coat
Palm Tree Silhouettes on Orange
Add a touch of paradise to your orange nails with palm tree silhouettes. This design is perfect for summer or vacation-themed manicures.
Palm tree nail art steps:
- Create an orange gradient base
- Use black polish and a thin brush to paint palm tree silhouettes
- Add small details like coconuts or birds for extra charm
- Seal with a top coat
Tropical Fruit Accents
Incorporate other tropical fruits alongside orange for a fun and fruity nail design. This playful look is sure to brighten your day and your nails.
Tropical fruit nail ideas:
- Pineapple accents on an orange base
- Watermelon slices with orange details
- Mixed fruit designs featuring oranges, lemons, and limes
Futuristic Flair: Orange Chrome Nails
Full Chrome Orange Coverage
For a truly eye-catching look, try full-coverage orange chrome nails. This metallic finish creates a mirror-like effect that’s both modern and glamorous.
Applying chrome powder:
- Apply a black or dark base coat
- Add a no-wipe top coat and cure if using gel
- Rub orange chrome powder onto the nail
- Seal with a top coat
Chrome Orange French Tips
Give the classic French manicure a futuristic twist with chrome orange tips. This look combines timeless elegance with modern edge.
Chrome French tip steps:
- Apply a nude base coat
- Create French tips with a no-wipe gel top coat
- Rub orange chrome powder onto the tips
- Seal the entire nail with a top coat
Duochrome Effects with Orange Base
Experiment with duochrome powders over an orange base for a color-shifting effect. This creates a mesmerizing nail look that changes color as it catches the light.
Creating duochrome nails:
- Apply an orange base coat
- Use a duochrome powder that shifts between orange and another color
- Experiment with different application techniques for unique effects
Elegance Meets Edge: Orange Nails with Rhinestones
Rhinestone Placement Techniques
Add some sparkle to your orange nails with strategically placed rhinestones. This elegant touch elevates any manicure and is perfect for special occasions.
Rhinestone placement ideas:
- Single rhinestone at the base of each nail
- Rhinestone outline of a shape or pattern
- Gradient effect with increasing rhinestone density
Ombre Rhinestone Designs
Combine the trendy ombre technique with rhinestone placement for a truly dazzling nail look. This design creates a gradient effect with both color and sparkle.
Creating ombre rhinestone nails:
- Apply an orange ombre base
- Place rhinestones densely at the tip, gradually decreasing towards the cuticle
- Use rhinestones in coordinating colors for added depth
- Seal with a thick top coat to secure stones
3D Nail Jewelry with Orange Base
Take your rhinestone game to the next level with 3D nail jewelry. These larger, more intricate pieces create a luxurious and eye-catching nail design.
3D nail jewelry tips:
- Choose pieces that complement your orange base color
- Use strong nail glue for larger jewelry pieces
- Limit 3D elements to accent nails for practicality
See amazing nail combinations options with black dress : Nail colors to complement black dress
Stripes and Sass: Orange Nail Designs
Pinstripe Orange Nails
Incorporate fine stripes into your orange nail design for a sleek and sophisticated look. This versatile style can be adapted for both casual and formal occasions.
Creating pinstripe nails:
- Apply an orange base coat
- Use striping tape or a thin brush to create fine lines
- Experiment with different stripe directions and spacing
- Seal with a top coat, carefully removing any tape beforehand
Colour-Blocking with Stripes
Combine bold stripes with color-blocking techniques for a modern and graphic orange nail design. This look is perfect for those who love geometric styles.
Colour-blocking ideas:
- Use tape to create clean, straight lines
- Combine orange with complementary colors like blue or green
- Incorporate negative space for added interest
Rainbow Stripes Featuring Orange
Make orange the star in a rainbow stripe design. This cheerful and colorful look is sure to brighten your day and your nails.
Rainbow stripe techniques:
- Use a striping brush for thin, even lines
- Start with orange as the central color and build outwards
- Try a diagonal rainbow stripe for a dynamic effect
Summer Vibes: Orange Nail Art
Beach-Inspired Designs
Bring the beach to your nails with orange-based designs inspired by summer fun. These playful looks are perfect for vacations or anytime you want to feel the summer spirit.
Beach nail art ideas:
- Orange base with white wave designs
- Seashell accents on an orange background
- Sunset-inspired gradients with palm tree silhouettes
Neon Orange with Summer Motifs
Combine bright neon orange with classic summer motifs for a bold and festive nail look. This design is sure to stand out and capture the essence of summer fun.
Summer motif suggestions:
- Tiny ice cream cones or popsicles
- Sunglasses or sun shapes
- Beach ball patterns
Fruit Salad Nail Art Featuring Orange
Create a delicious-looking manicure with fruit salad inspired nail art. This design incorporates various fruit shapes and colors, with orange taking center stage.
Fruit salad nail art steps:
- Apply a light base color
- Use dotting tools and thin brushes to create various fruit shapes
- Add details like seeds or leaf accents
- Seal with a glossy top coat for a juicy look
Conclusion:
orange nail designs offer a vibrant and versatile option for expressing your personal style. From classic looks to bold and artistic designs, there’s an orange nail art idea for everyone. Don’t be afraid to experiment with different shades, techniques, and combinations to find the perfect orange manicure that brightens your day and complements your unique style.

Sarah Williams is an experienced blogger and fashion enthusiast at Glammer Galaxy. With a passion for beauty and style, she shares expert insights on hair trends, nail art, and fashion tips. Her creative flair and years of experience make her a go-to source for all things glam!

